Arduino Input
Arduino Nano Connection Instructions
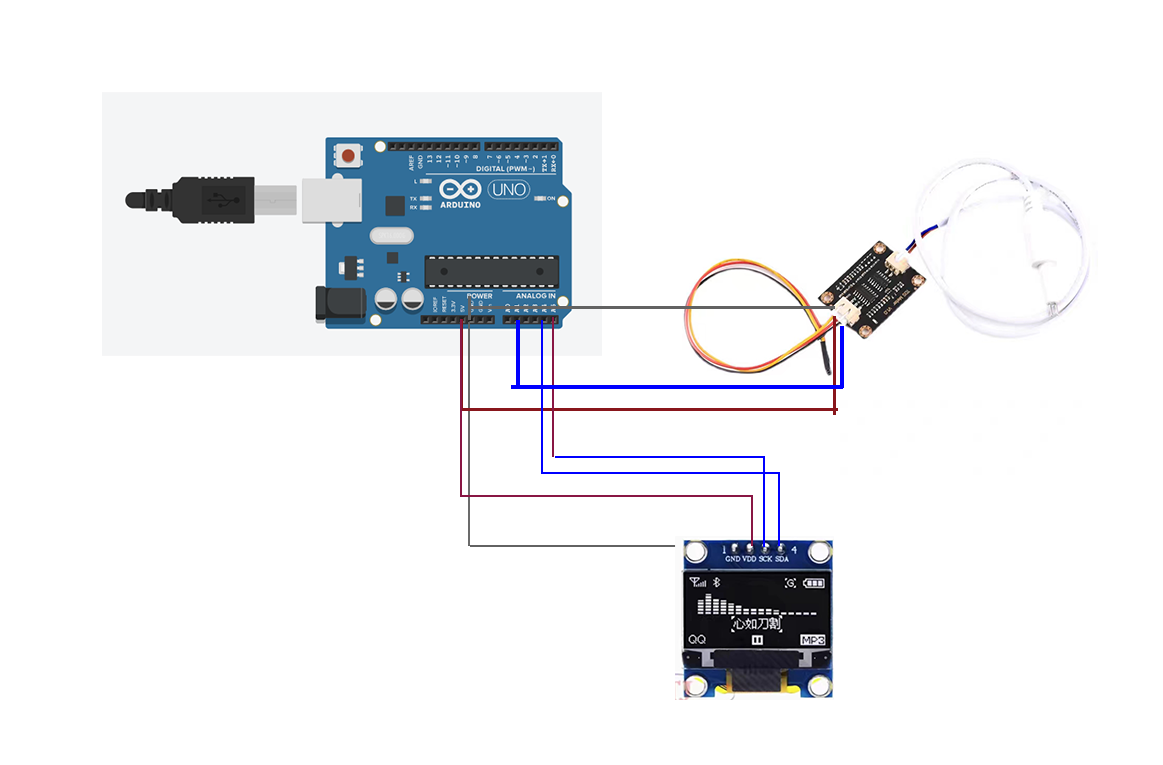
TDS Sensor:
- The signal wire of the TDS sensor connects to the A1 analog input on the Arduino Nano.
- The GND (ground) of the TDS sensor connects to the GND on the Arduino Nano.
- The VCC (positive power supply) of the TDS sensor connects to the 5V pin on the Arduino Nano.
OLED Screen (Using U8G2 Library):
- The SCL (clock line) of the OLED screen connects to A5 (I2C clock line SCL) on the Arduino Nano.
- The SDA (data line) of the OLED screen connects to A4 (I2C data line SDA) on the Arduino Nano.
- The GND (ground) of the OLED screen connects to the GND on the Arduino Nano.
- The VCC (positive power supply) of the OLED screen connects to either 3.3V or 5V on the Arduino Nano (depending on the screen's voltage requirements; if 5V is required, connect to 5V).
2. principle
The project Principle section details how the project works, including how the TDS sensor works and how to identify different liquids by the detected conductivity.
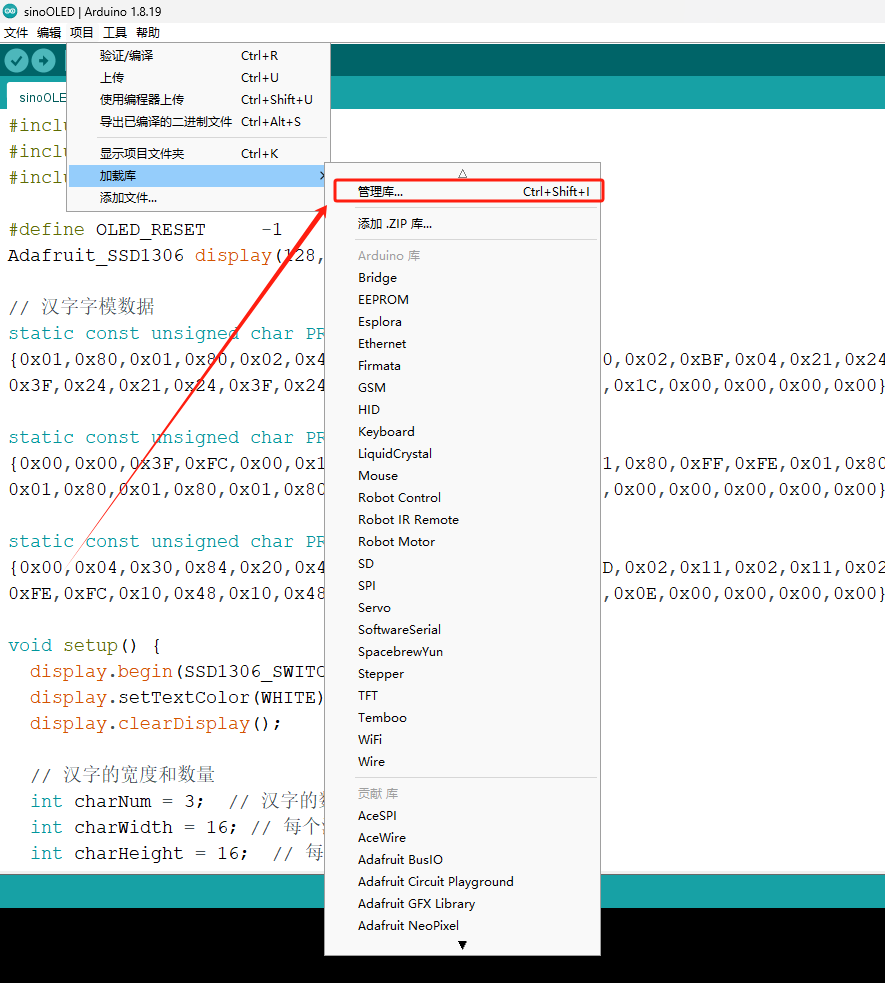
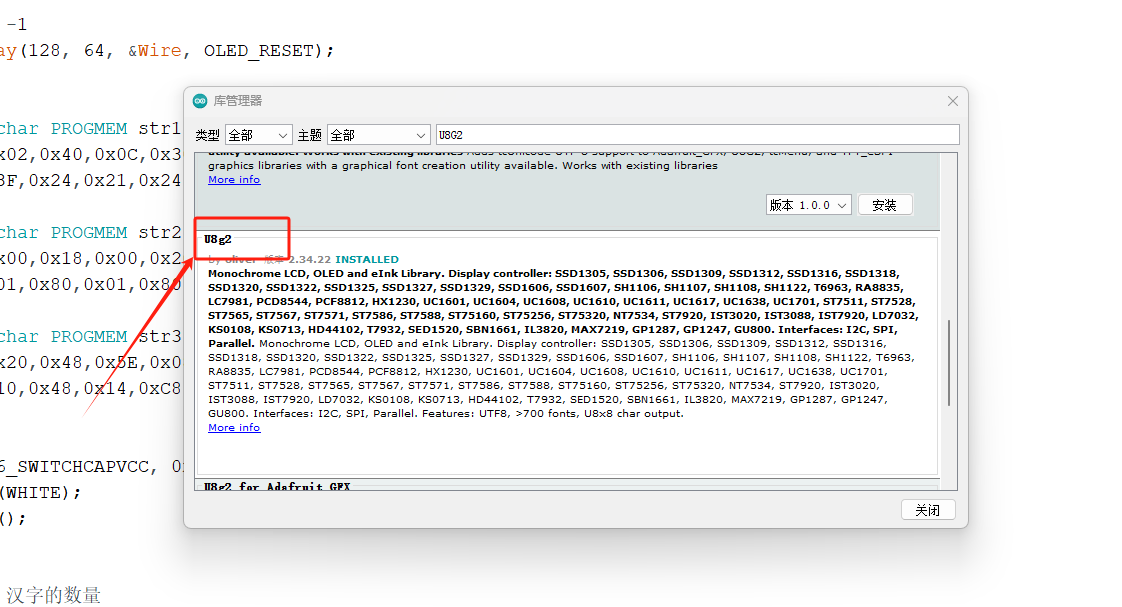
Add the U8G2 library
3. Code introduction
Below is the complete Arduino code for controlling the different liquid types displayed on the OLED screen.
#include < U8g2lib.h> // 包含U8g2图形库用于控制OLED屏幕
#include < Wire.h> // 包含Wire库以使用I2C通信
// OLED
U8G2_SSD1306_128X64_NONAME_F_HW_I2C u8g2(U8G2_R0, /* reset=*/ U8X8_PIN_NONE); // 创建U8G2对象以操作OLED
// TDS传感器配置
#define TdsSensorPin A1 // TDS传感器连接到模拟输入A1
#define VREF 5.0 // 参考电压
#define SCOUNT 10 // 采样次数,减少采样次数以加快响应时间
int analogBuffer[SCOUNT]; // 存储采样的数组
int analogBufferIndex = 0; // 当前采样索引
void setup() {
Serial.begin(115200); // 初始化串行通信
pinMode(TdsSensorPin, INPUT); // 设置TDS传感器引脚为输入模式
u8g2.begin(); // 初始化OLED屏幕
}
void loop() {
static unsigned long lastTime = millis(); // 记录上次读数的时间
// 采样TDS值
if (analogBufferIndex < SCOUNT) {
analogBuffer[analogBufferIndex] = analogRead(TdsSensorPin); // 读取当前TDS值
analogBufferIndex++;
} else {
int sum = 0;
for (int i = 0; i < SCOUNT; i++) {
sum += analogBuffer[i];
}
float averageVoltage = sum / (float)SCOUNT * (float)VREF / 1024.0;
float tdsValue = averageVoltage * 2000.0; // 简化的TDS计算(没有温度补偿)
displayTDSInfo(tdsValue);
analogBufferIndex = 0;
}
// 使用非阻塞延迟以减少延迟
unsigned long currentTime = millis();
if (currentTime - lastTime > 200) { // 每200毫秒采样一次
lastTime = currentTime;
analogBufferIndex = 0;
}
}
void displayTDSInfo(float tdsValue) {
// 根据TDS值选择显示的信息
const char* detectedLiquid;
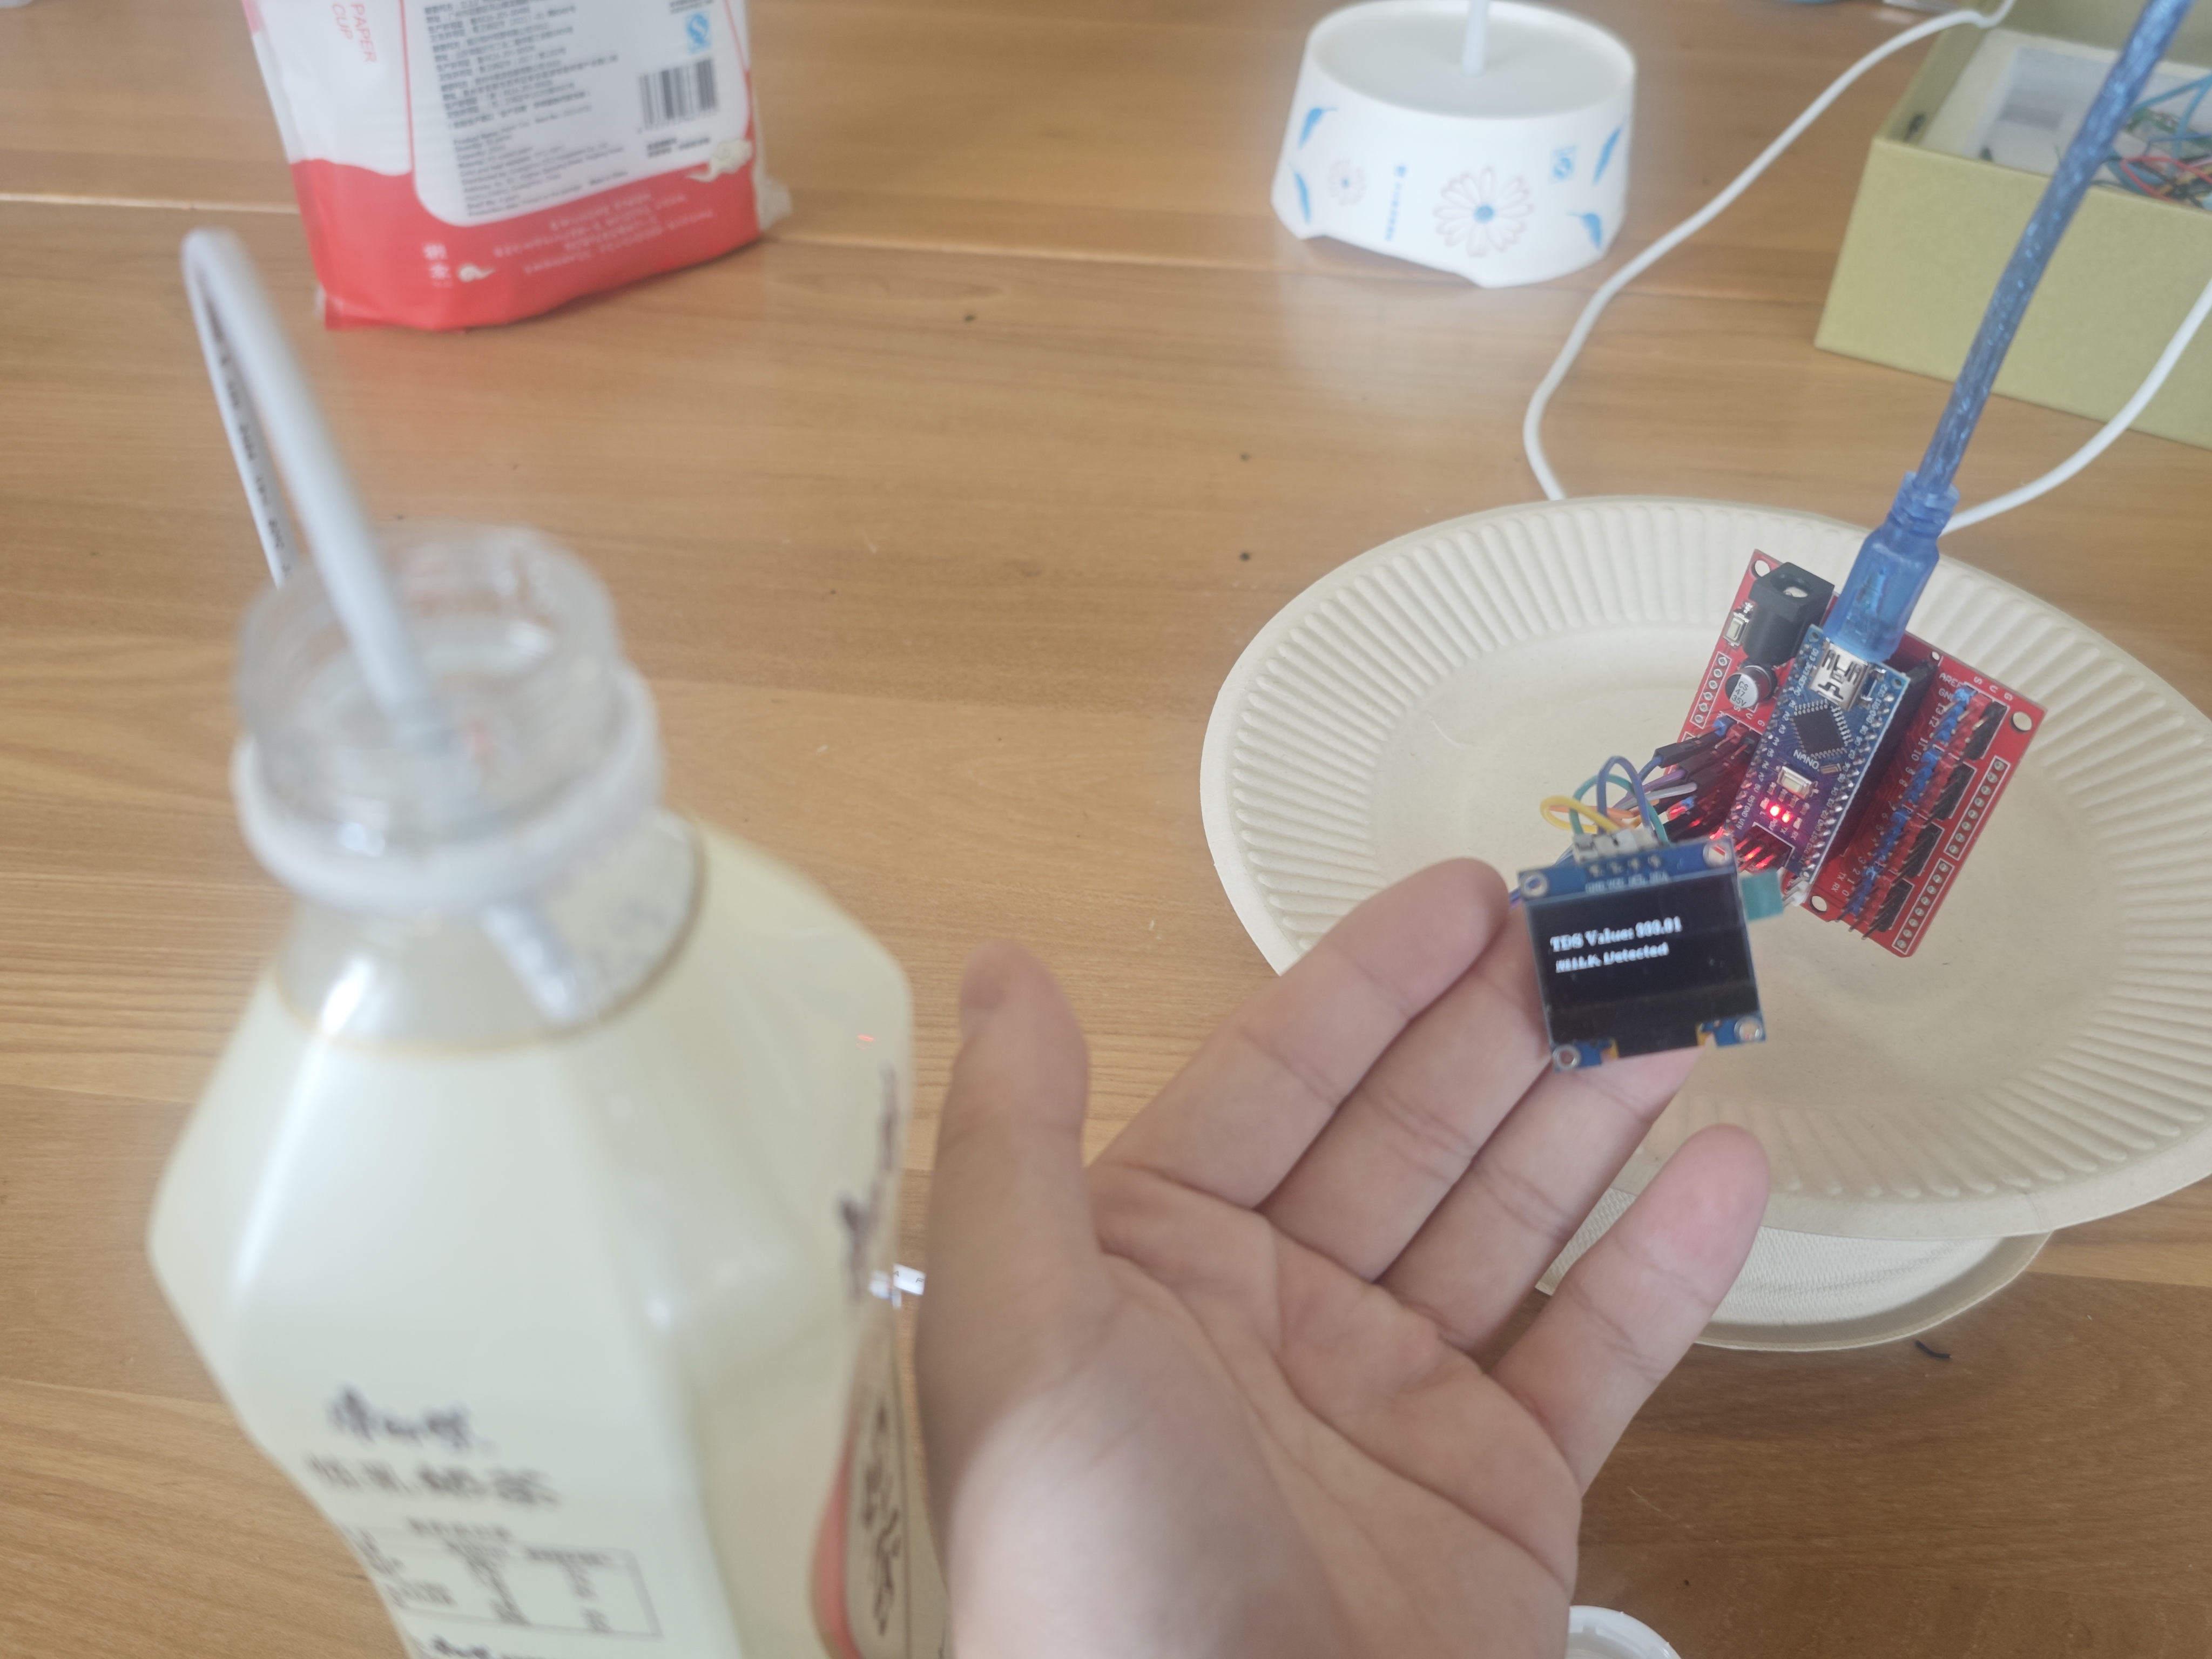
if (tdsValue >= 200 && tdsValue <= 900){
// TDS值在10到80之间,显示牛奶信息
detectedLiquid = "MILK Detected";
} else if (tdsValue > 900 && tdsValue <= 1500) {
// TDS值超过80,显示咖啡信息
detectedLiquid = "VINEGAR Detected";
} else if (tdsValue > 1900 && tdsValue <= 2800){
detectedLiquid = "Alcohol Detected";
}else if (tdsValue > 2501 && tdsValue <= 5000){
detectedLiquid = "Coffee Detected";
}else {
detectedLiquid = "Liquid not recognized";
}
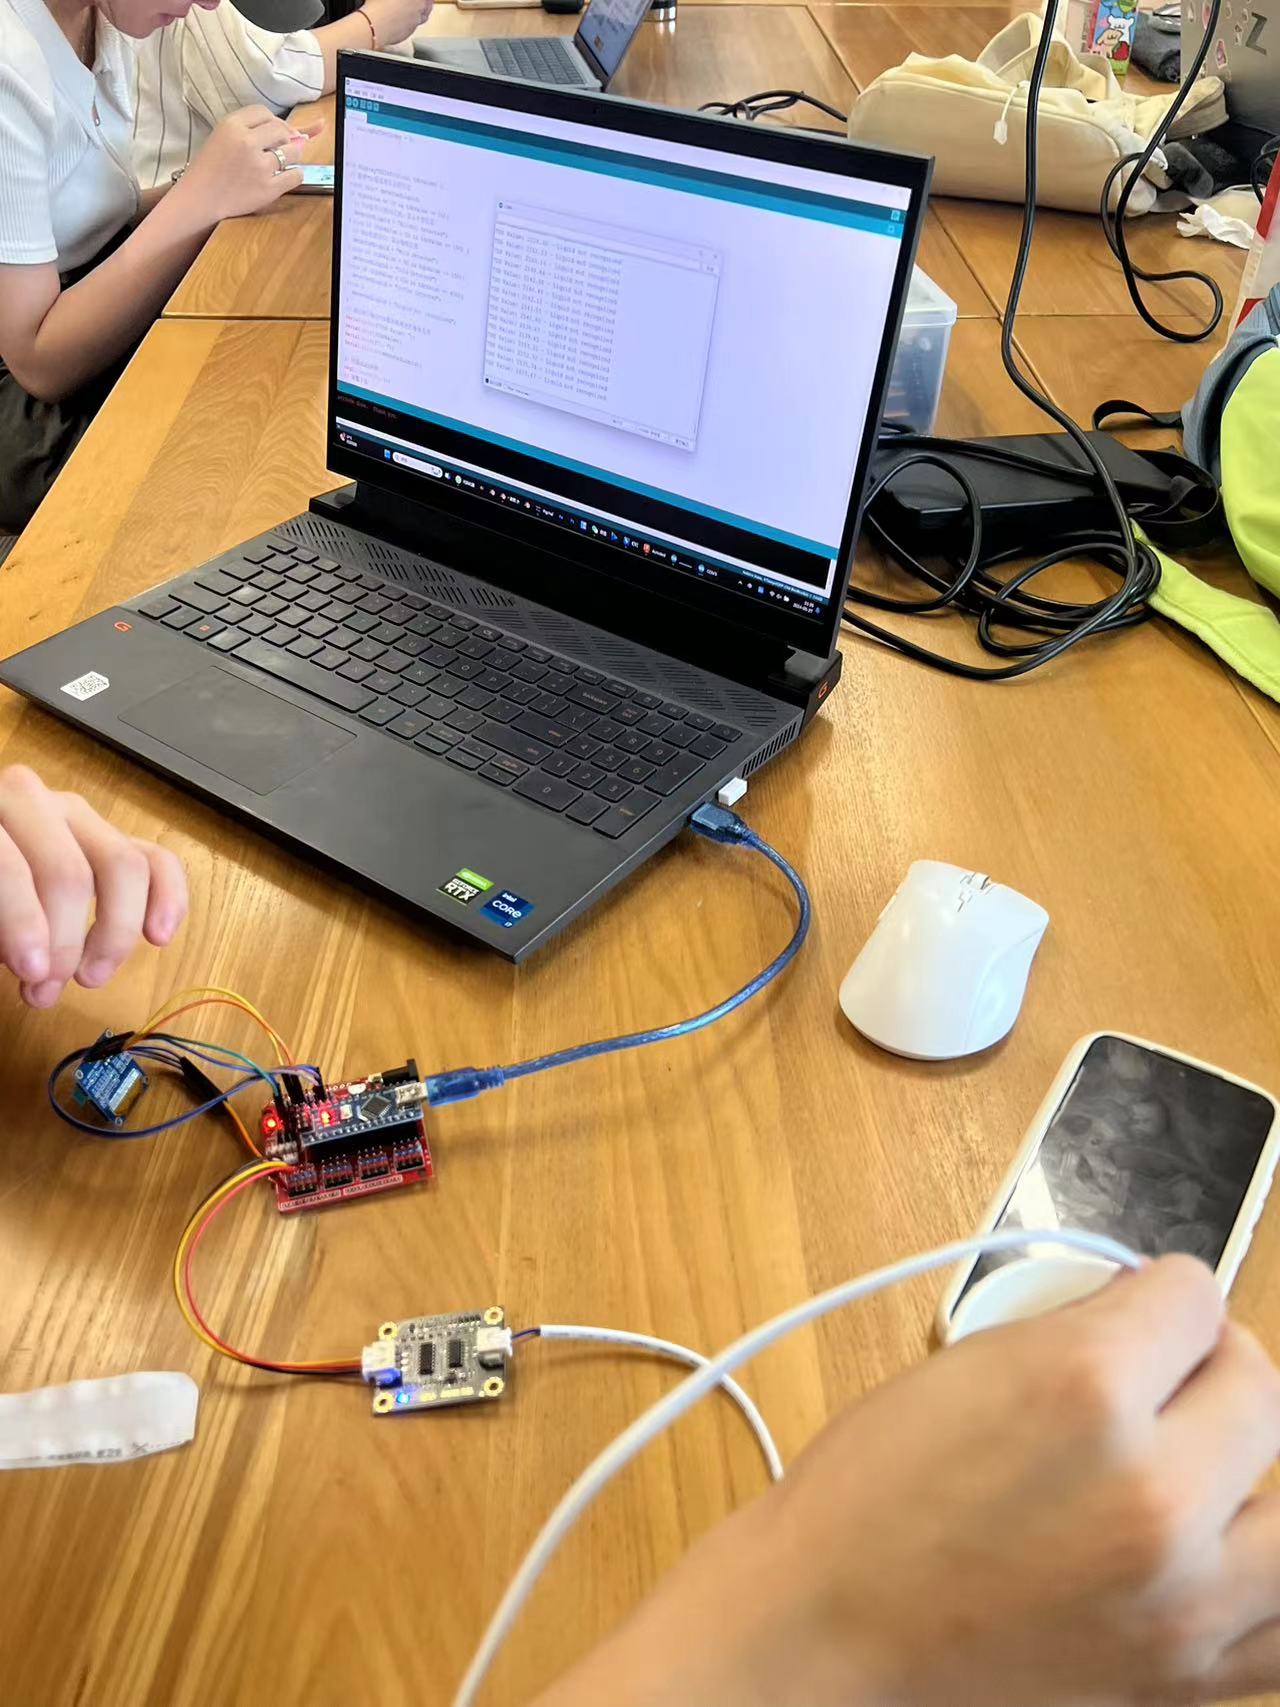
// 通过串口输出TDS值和检测到的液体类型
Serial.print("TDS Value: ");
Serial.print(tdsValue);
Serial.print(" - ");
Serial.println(detectedLiquid);
// 清除OLED屏幕
u8g2.clearBuffer();
// 设置字体
u8g2.setFont(u8g2_font_ncenB08_tr);
// 将TDS值和检测到的液体类型显示在OLED屏幕上
u8g2.setCursor(0, 24);
u8g2.print("TDS Value: ");
u8g2.print(tdsValue);
u8g2.setCursor(0, 40);
u8g2.print(detectedLiquid);
// 发送缓冲区的内容到OLED屏幕上显示
u8g2.sendBuffer();
}
4. Sum up
This project uses TDS sensors to detect different liquids and display the results. The aim is to provide a convenient on-site real-time monitoring scheme for laboratory testing.
5.show it can run